Wood Round Ornaments | A Festive Craft for Kids and Adults!


If you're looking for a way to add some family personal touches to your tree, this is such a fun way to do it! I originally came up with this craft for Anchor, but decided to get in on the fun myself. I'll show you how to set it up for kids and how to do a pretty gold leaf one yourself!

1. Create or buy your wood rounds.
We cut ours instead of buying premade, but you can purchase them at craft stores. If you're going to cut them yourself, you can forage for fallen branches that are your desired width, or purchase birch logs at your local garden store.
We cut ours about a 1/4in thick each, then drilled a hole at the top for the string to hang them later on.
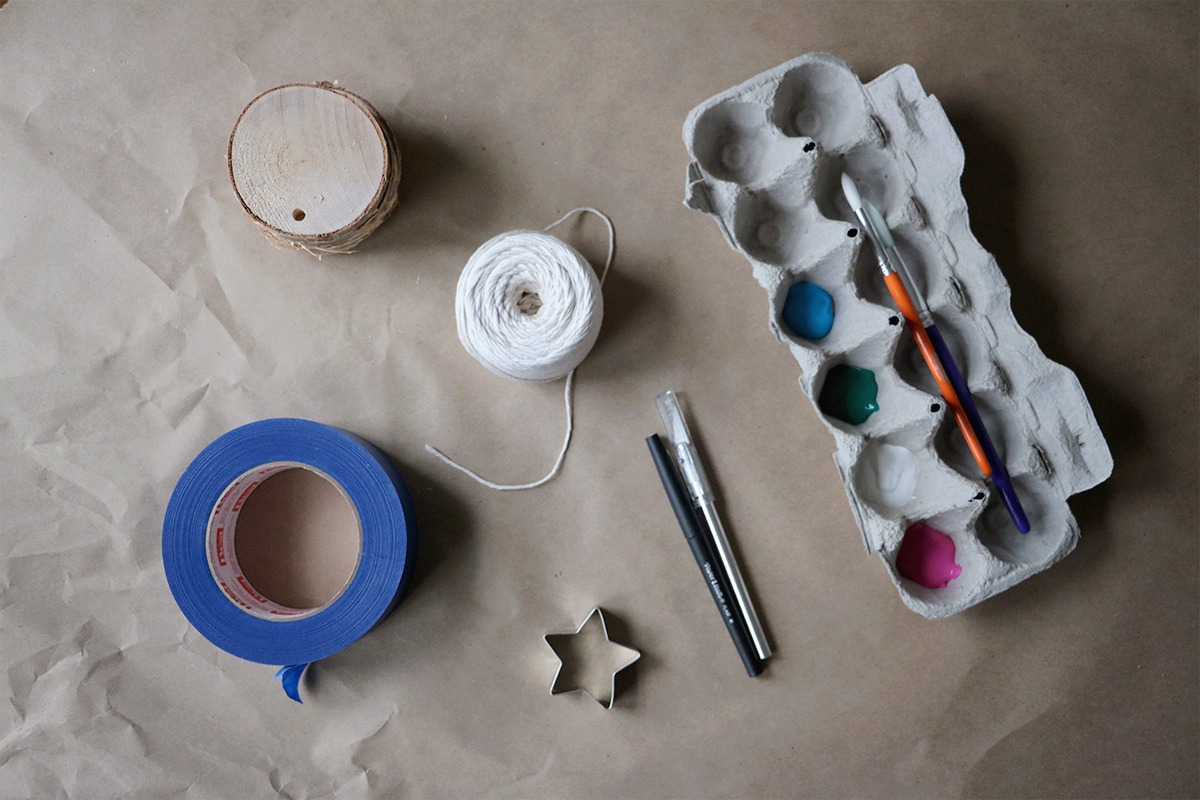
2. Gather your supplies.
You will need:
small wood rounds with hole
paints and brushes
painter's tape
x-acto knife
cookie cutter
pen
twine


3. Cover wood with painter's tape.
Be sure to cover the whole area and mark where to hole is. You can also cover the edge with painter's tape if you want to prevent it from getting painted on.
4. Place your cookie cutter on the tape.
Make sure it's right side up (locate the hole).


5. Trace your cookie cutter.
Trace the inside rather than the outside with a pen.
6. Cut out your tracing with your x-acto knife.

7. Paint!

8. Finish up.
Allow them to dry completely. This depends on the type of paint you use—I allowed ours to dry for 5 hours, but overnight is best. Carefully peel away the tape to reveal your beautiful star! Sign and date the back, the tie some string for haning :)
Note: We also did some inverted stars, meaning we left the painters tape on the star removing the tape around it, then painted the uncovered area. This made for a really interesting look, where to star is wooden! You can see what I'm talking about in the first photo :)
Gold Foil Star

Here's the adult version! I say adult because gold foil is so finicky to work with, but any patient child could do this one as well. I love the way it catches light and shines on the tree :)

1. Prep your wood round.
Follow the instructions above to get your wood round ready for crafting.
2. Gather your materials.
You will need mod podge (or another adhesive) and gold foil.
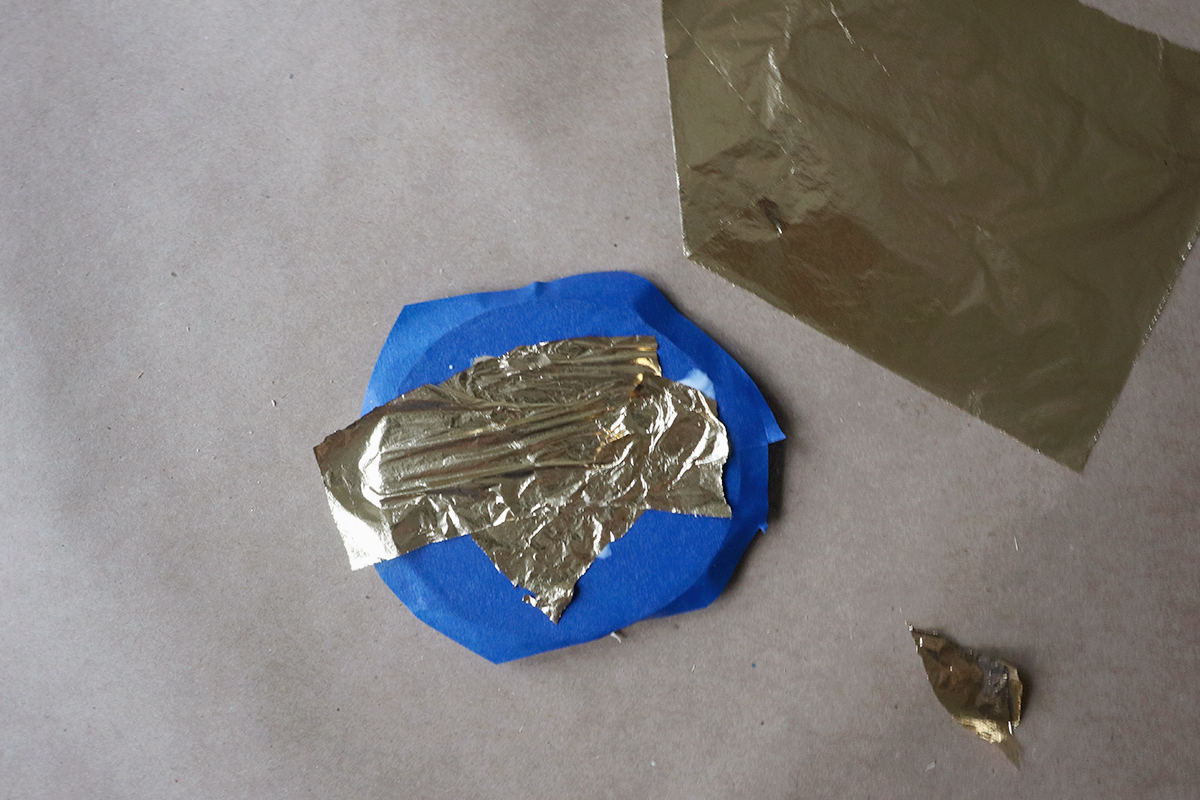
3. Place your gold foil on top of your adhesive.
Wherever you place your adhesive is where the foil will stick, so get creative! I placed my adhesive organically so that the whole star isn't gold foil.
Be very careful with this part as gold foil tears easily. Just place it down slowly and gently then pat it down all over so it sticks. Allow it to dry for 30 mins to an hour.

4. Reveal and add finishing touches.
I decided to paint in the open areas with white paint, but you can leave yours as is or do whatever you wish!